LATHE 4410
Date: 4-25-2000 (it all begins)
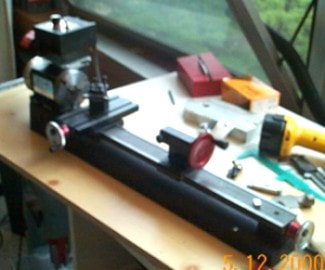
Here is my manual Sherline model 4410 lathe. Overall I have been very happy with its precision, rigidity, and versatility. I personally found the "rocker" tool post a pain for most work and milled a new slot in my tool holder for "right on the spot" lathing. The 3-jaw chuck is wonderful and I hope to be adding an independent 4-jaw chuck soon. I also plan to buy the spacers so I can turn larger diameter parts
- Strongly suggest buying the LONGER bed lathe even if you don't think you need it right now
Adding Safety On/Off Light
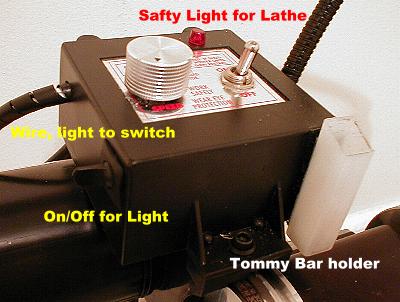
Here is my "control box." I have added a switch for a halogen 12V 35 watt light. A small power 110v power source runs it. I also Velcroed a holder for my Tommy bars, just a plastic case that one of the endmills came in. Also, you can see my Safety Light. For this VERY simple mod which could save your fingers CLICK HERE
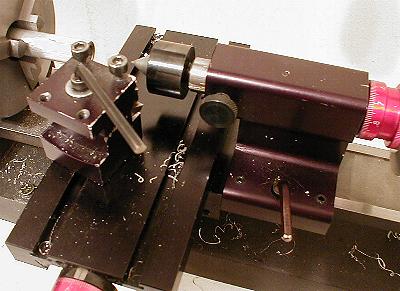
I cut and super glued 2 Allen wrenches to the bolts of the tool holder and tailslide. Simple and quick!
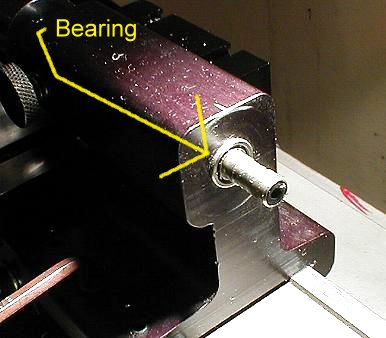
I found a little bit of play around the handle of the tail slider. Not liking this I added a flanged bearing (6mm ID). To get the hole "perfect," I put a drill bit in the chuck and ran it through the tailslide. It's working perfectly and no play is noticed.
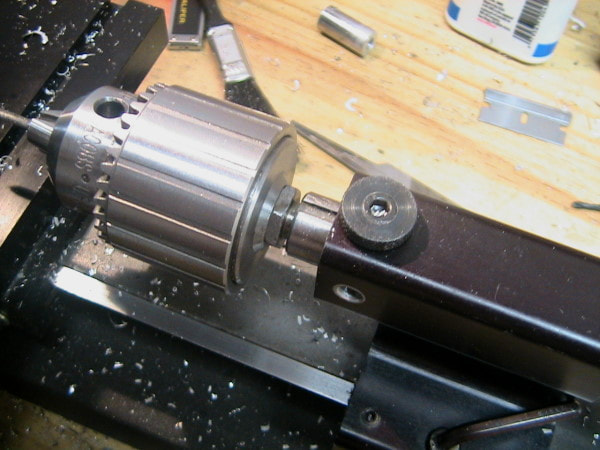
The original hole for the stop screw finally stripped and to keep it simple I just drilled and tapped for a new hole on top. Good as new.
7-4-04
7-4-04
Backlash Compensations
The Original Idea
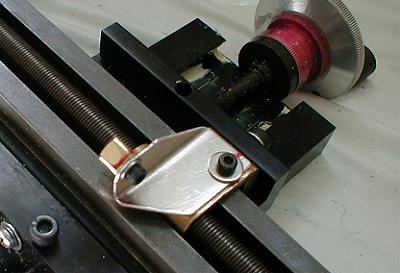
You will need to get a saddle nut for this mod. First, grind the tip off, about 2-3 mm then drill/tap it lengthwise for a screw. Drill and tap the sliding nut also for another screw. The nut needs to be installed with the indentation for the ball towards the headstock. Make a 90 degree plate with enlarged holes and mount it. To compensate for backlash, turn the nut and tighten the screws. That's it! Adjustable backlash compensation and even better if your lathe is CNC.
A picture of it with the lathe assembled. Again, remember that you will need to grind the lever down a few mm so it does not touch the base.
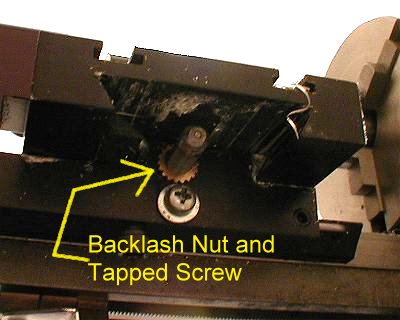
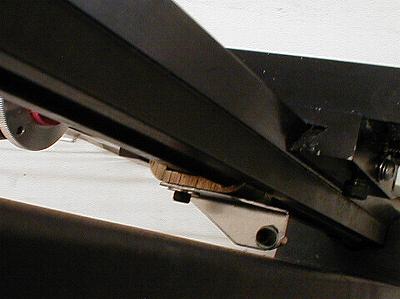
Backlash nut and holder. I have also added a backlash nut to the other axis. I bought the nut from Sherline, drilled a larger hole so it would fit in the axis and put it in. A screw with a washer holds it in place. Again, simple, cheap and adjustable.
QUICK TOOL CHANGER

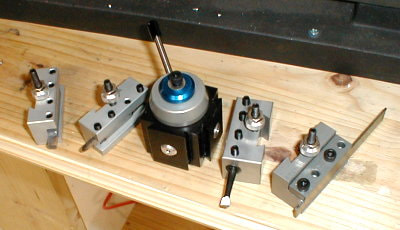
I received a quick-tool changer to review. Overall impression? Excellent! The machining quality is near perfection! It's completely adjustable and you can mount up to 4 different tools with the kit. A "CAM" locking action secures each holder and it works very well!
- I see TS Engineering is no longer making this but others are available.
POWER FEED (NEVER DONE)
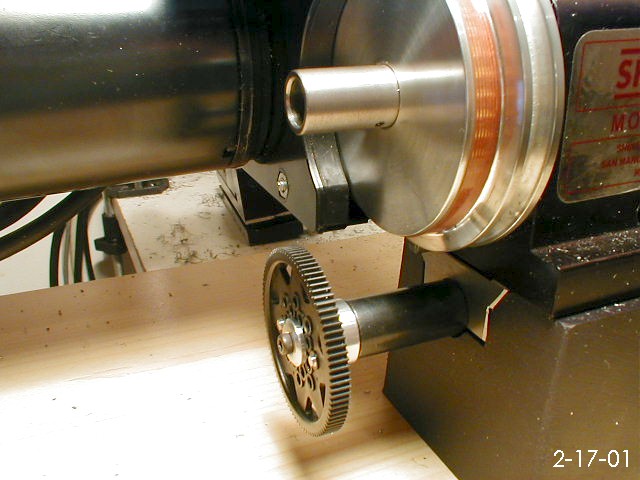

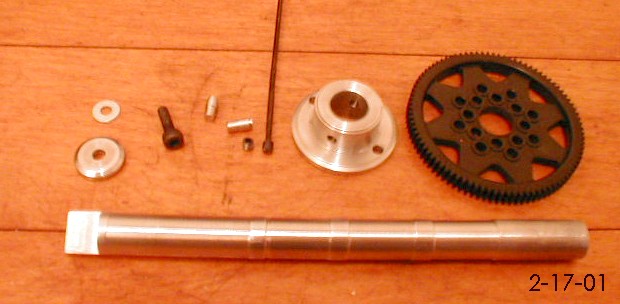
I started making a power shaft for the lathe. My goal was to be able to have the handle on the other side. While I am very proud of these early pieces, the project was never finished.
