OLD DRIVER SETUP
|
Date: 3-3-2001
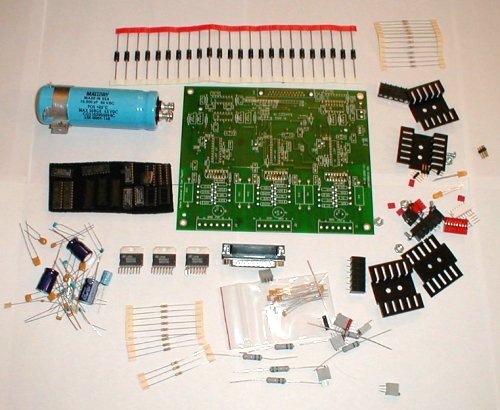
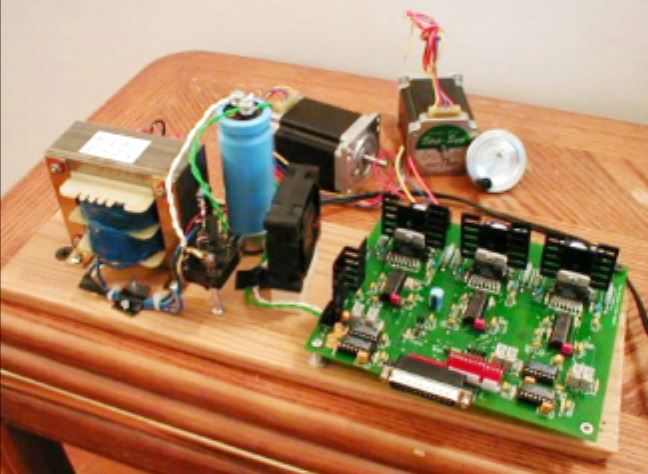
I started out with MaxNC single pole motors and drivers but found they were to weak... later I learned about Camtronics. Sadly, Dan has stopped selling these boards and they are no longer available . Thank you Dan for making such an awesome kit! I bought drivers from Camtronics, 3 Axis 2 amp bipolar choppers and they work great. These are step/direction drivers made for bipolar motors. You can connect a 4, 6, or 8 wire motor to these drivers. Odd number wires motors are unipolar (you can connect a 6 or 8 wire motor to unipolar too-I think?). |
|
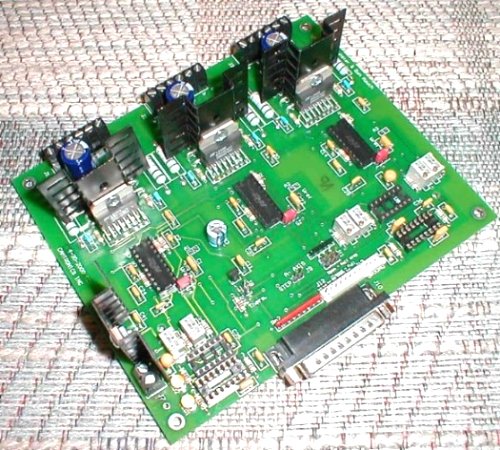
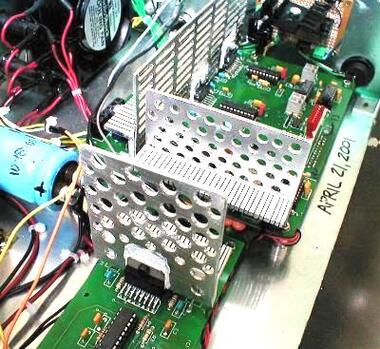
After the board has been carefully soldered, checked and rechecked, I hooked up all of the required elements and hit the switch!
No Smoke!!! Yippie! It works and is SO FREAKING COOL! The motors make some really cool noises as they go through their motions. Much quieter than the unipolar setup I first tried. |
|
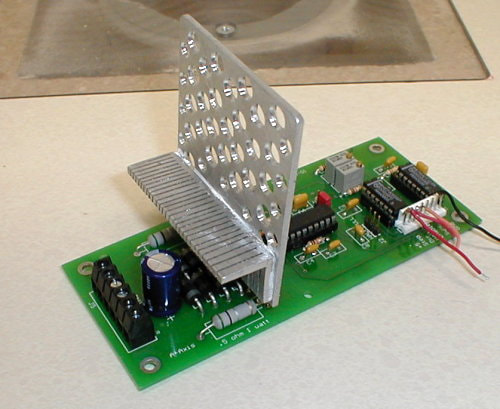
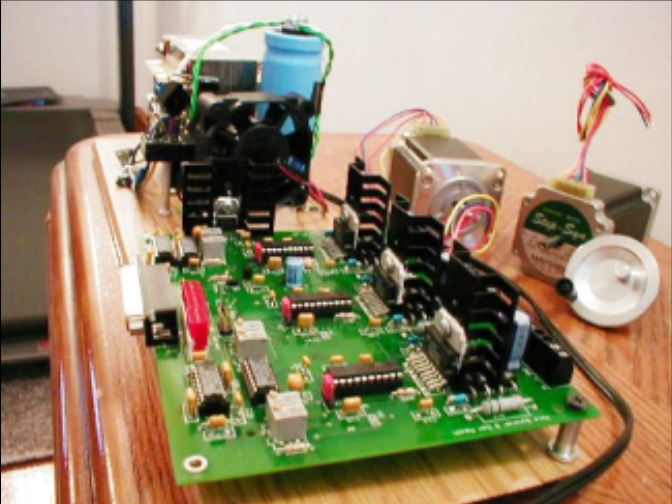
Later I bought a single axis 2 amp driver for my 4th axis. You will need to make larger heat sinks and add a cooling fan if you plan to run the boards on 24v.
Note: I would buy a 4th axis driver after you find a reason for its use and know how to use it. Making the Rotary table CNC ready is an excellent idea still! You can plug it into the Y axis and get a lot accomplished (everything I have done to now).
|
|
|
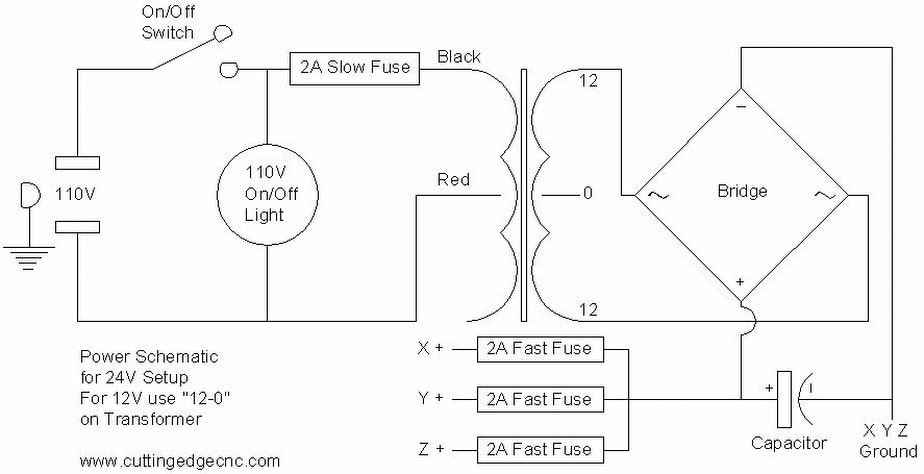
POWER TO BOARDS
Here is the schematic for powering your boards and stepper motors. The parts here are listed in the previous window.
|

|
|
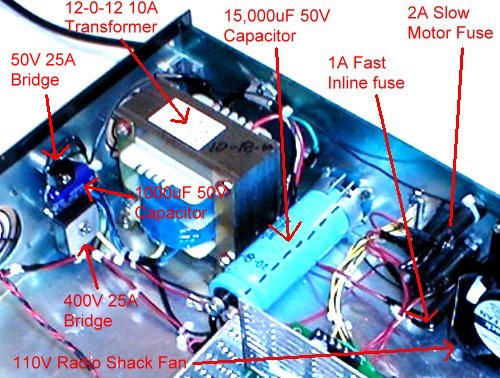
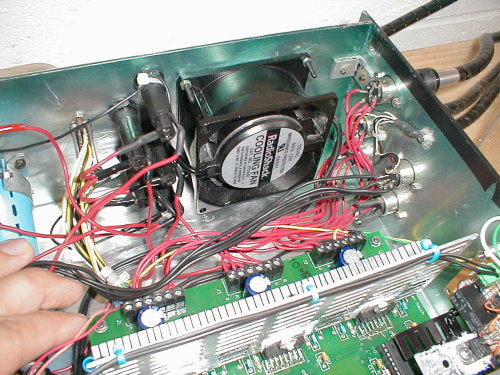
MAIN POWER TO MOTORS-I made my own power supply for the drivers per Dan's recommendation. The schematic for it and how to step 24V down to 5V is in the next cell.
Most parts bought from: MPJA SupplyCheap, but nice 12v 13 amp Supply |
|
|
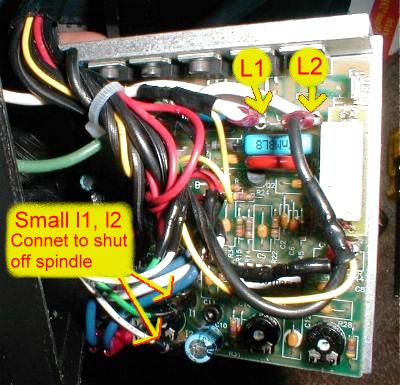
SPINDLE ON/OFF
Date: 3-4-2001
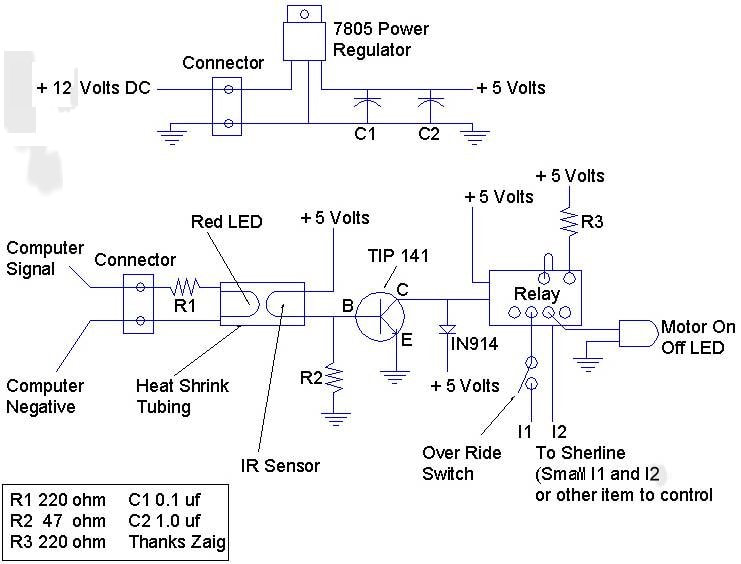
CONTROLLING SHUTOFF VIA M03/M05 G-CODE-Build your own
CONTROLLING SHUTOFF VIA M03/M05 G-CODE-Build your own
My Brother Makes a Board
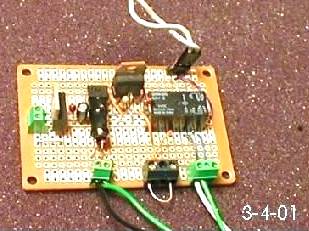
I told my brother, Zaig about this and wanting spindle control via CNC. He was on it! He made a 100% custom board which uses the computer's output to turn on an LED. A sensor detects it, clicks a relay and turns on/off whatever is connected. It's safer since there is no direct connection to the computers' parallel port. The board also has a safety light incorporated so you will know when the "application" is on/off.
I told my brother, Zaig about this and wanting spindle control via CNC. He was on it! He made a 100% custom board which uses the computer's output to turn on an LED. A sensor detects it, clicks a relay and turns on/off whatever is connected. It's safer since there is no direct connection to the computers' parallel port. The board also has a safety light incorporated so you will know when the "application" is on/off.

|
|
