CCPM-ing the GPH!
Date: 05-14-2002
Total Time: about 16 hours
Total Time: about 16 hours
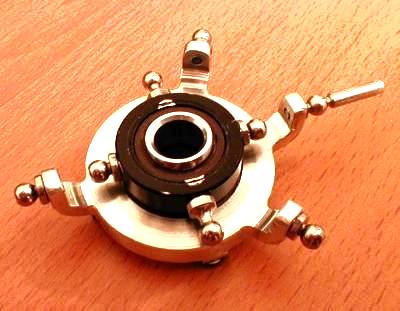
"CCPM-ing" the GPH! with the least amount of modifications to the frame! All parts are made manually on my lathe and/or mill

First you need to take the swashplate apart which is pretty easy. Unscrew the 4 screws, remove the balls, and push the top portion out of the bottom. You can also buy a CCPM swashplate, just make sure its for a 10 mm main shaft.
NOTE: You can use the same swashplate and use 90 degree CCPM. 120 is more stable but 90 should work.
NOTE: You can use the same swashplate and use 90 degree CCPM. 120 is more stable but 90 should work.

Here is the "billet" of aluminum (man I have always wanted to say that :) that will become the lower portion of the swashplate! Thanks Jack for sending me some! I plan to make it with 3 points 120 degrees apart and another point for the anti-rotation link. Here we go :)
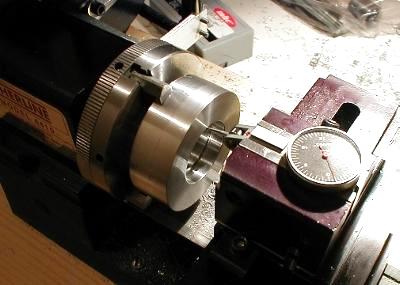
Here you can see the middle of the aluminum bored out for the 32 mm bearing. The hardest part of the whole project was thinking of how to make it. Plan out your projects, where and how far to cut and if you're going to need to remount the piece. The jaws of the chuck here are reversed. The 32 mm bearing fits perfectly, NO PLAY!

I found that no matter how well you machine, if you REMOUNT a part you will probably have to dial it in to get it straight. KEEP THIS IN MIND.

I completely bored through the aluminum and made a "step" for the top portion of the swashplate. The outside is now cut to shape. I had to flip the part over a few times and EVERY TIME I did I had to dial indicate it in! Once a part is mounted, do as MUCH work on it as you can before removing it.

So far it looks like a little bowl :) Time for the mill to finish it up!
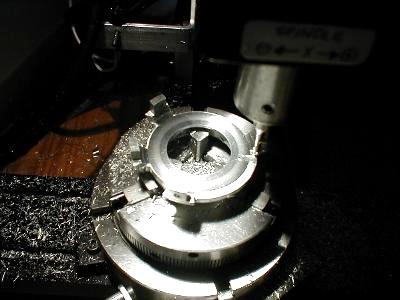
I put the jaws on the chuck the normal way and remounted the piece. The piece is still held in the "reverse" way. The swashplate is taking shape.
Here is the bottom where the 4 screws are. ALL DONE!
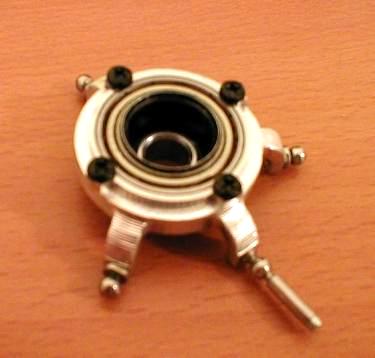
Here we are! Actually I must say the picture makes it look much nicer then it is. The finish is not as good as I had hoped and there was quite a bit of hand filing that was needed. I think more patients, better endmills, and more measuring would of made it "nicer."
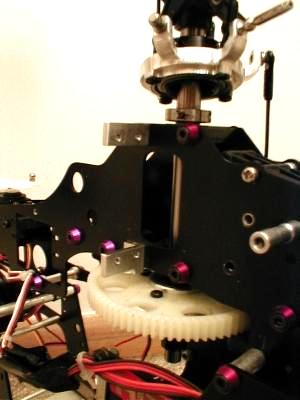
Time for mounts on the GPH. I bought some 1/8" right angle aluminum from Home Depot for this. Cut it to size and mount it up. The mounts are held by the main bearing block screws.
Here you can see the 2 servos mounted. I am going to see if I can get the angle of the pushrods less. I plan to use 3 Hitec 545s.
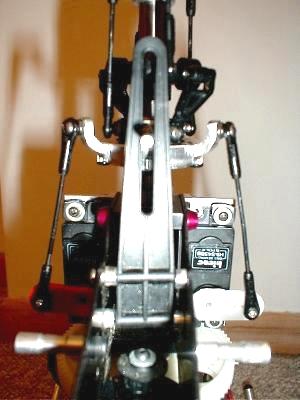
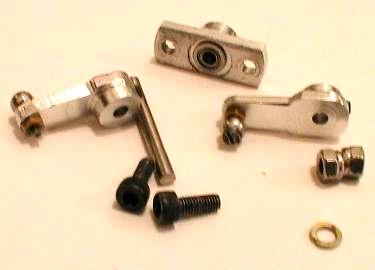
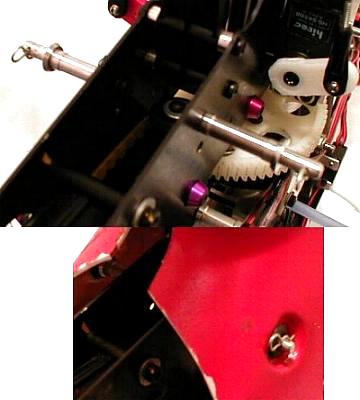
These where made manually and quickly, you would be surprised to know how easy it is to make these . It's time to get this done and flying! If this whole setup works I may remake these nicer. The arms are tapped for 3 mm setscrews and mostly made on the lathe with 16 mm between the pivot point and ball (same as servo horns). I probably replaced about 50 parts for these and some weight!
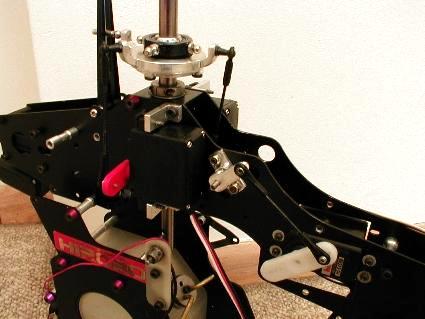
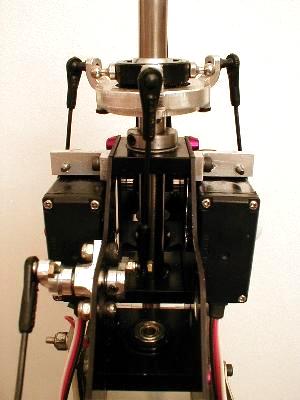
Here is the full setup! IT WORKS!!!!! This is a picture from the front to show the setup of the elevator mechanism.

I tried every position for the elevator servo and this is the best place I came with for this setup. The main problem I ran into was the starter bearing kept getting in the way. Time to test fly it!
IT FLIES!!!! Its very smooth and the setup is simple now that I know how to use the radio's CCPM setup properly. Next heli will defiantly be CCPM!
IT FLIES!!!! Its very smooth and the setup is simple now that I know how to use the radio's CCPM setup properly. Next heli will defiantly be CCPM!
One of the things I have always hated about the GPH are the 4 canopy screws! Its such a pain to find the holes for the screws not to mention putting them in and take them out every time you want to check something. Finally, I've made new standoffs with holes for body clips! No more finding the hole for the canopy and no more screws. 6-10-02
UPDATE: 7-16-02
I 'm finding the elevator bellcrank touches at full + pitch and full forward with the starter bearing. Not that I do to many outside loops, (1 to this date hehe) but I think I may just get rid of them and mount the elevator servo on the back for a direct link to the swashplate. I also find my throws are not the same throughout the full pitch range, but this is probably do to the fact that 16mm is not the optimal distance (remember I just choose 16 :) It however rolls and loops mighty quick! Also, I Love the canopy mounts, it's so much easier to work on the heli at the field!
I 'm finding the elevator bellcrank touches at full + pitch and full forward with the starter bearing. Not that I do to many outside loops, (1 to this date hehe) but I think I may just get rid of them and mount the elevator servo on the back for a direct link to the swashplate. I also find my throws are not the same throughout the full pitch range, but this is probably do to the fact that 16mm is not the optimal distance (remember I just choose 16 :) It however rolls and loops mighty quick! Also, I Love the canopy mounts, it's so much easier to work on the heli at the field!
